 ScanToBIM-CAD
As-Built Floor Plans from Laser Scans: A Step-by-Step Guide
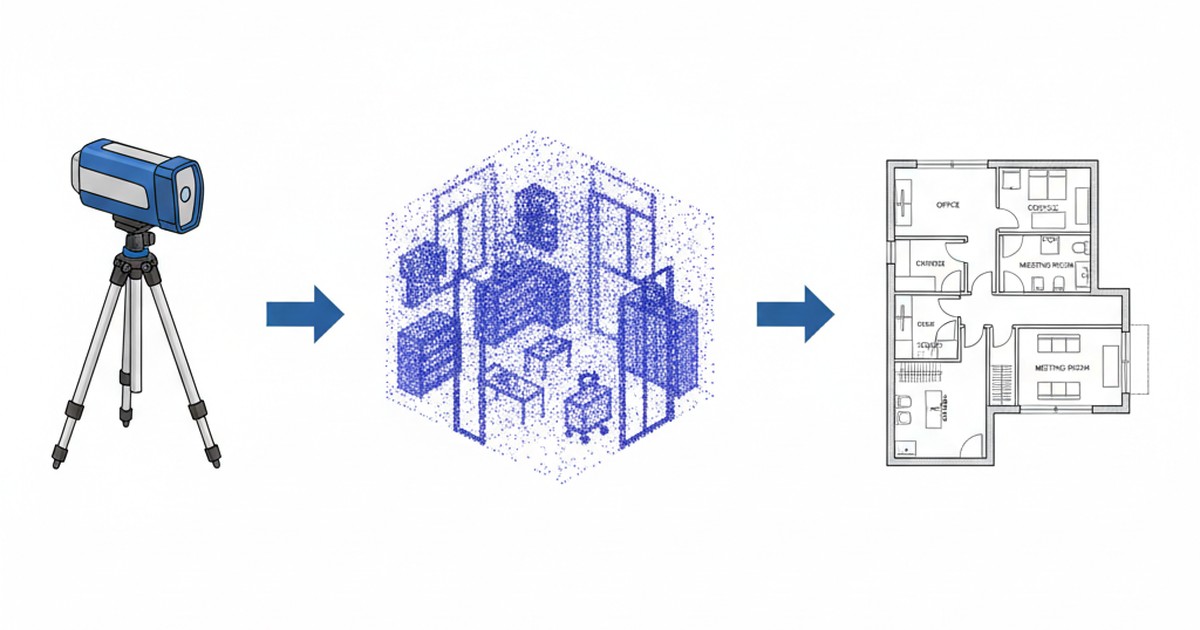
📋 Quick Summary:
- ✅ Traditional workflow: 1-2 weeks per project, $1,960-$4,260 cost
- ✅ Modern AI workflow: model usually within a few hours + 1.5-3.5 hours of your review, $29 per scan (all stories)
- ✅ Time savings: 1-3 hours of review instead of 20-31 hours of manual drafting for a 500m² office
- ✅ Best for: Renovation projects, facility management, building documentation
You've just completed a laser scan of an existing building. The point cloud data is perfect—millions of precise measurements showing every wall, door, window, and structural element exactly as it exists. Now you need to turn this raw scan data into an as-built floor plan—a professional CAD drawing that accurately documents the current state of the building.
Whether you're working on a renovation project, creating facility management documentation, or preparing for a design-build project, as-built floor plans are essential. They serve as the foundation for all subsequent design work, ensuring that architects and engineers are working with accurate existing conditions.
In this comprehensive guide, we'll walk through the complete workflow for creating as-built floor plans from laser scans. We'll compare the traditional manual drafting approach with modern AI-assisted methods, show you typical cost and time savings, and provide a step-by-step process you can follow for your next project.
What is an As-Built Floor Plan?
An as-built floor plan is a technical drawing that documents the existing conditions of a building exactly as it stands today. Unlike design drawings (which show what will be built) or construction drawings (which show what should be built), as-built drawings show what actually exists.
Key Characteristics of As-Built Floor Plans:
- ✅ Accurate measurements of all walls, doors, and windows
- ✅ Documentation of existing conditions (not proposed changes)
- ✅ Professional CAD or BIM format (DXF, DWG, PDF, or a Revit or IFC model)
- ✅ Suitable for renovation design, facility management, or legal documentation
- ✅ Typically includes dimensions, room labels, and door/window schedules
Why As-Built Floor Plans Matter
As-built documentation is critical for several reasons:
🏗️ Renovation Projects
Architects need accurate existing conditions to design renovations, additions, or remodels. Without precise as-built drawings, design errors can lead to costly construction mistakes.
📋 Facility Management
Building owners use as-built plans for space planning, maintenance scheduling, and asset management. Accurate floor plans help optimize space utilization.
⚖️ Legal Documentation
As-built drawings serve as legal records of building conditions. They're essential for property transactions, insurance claims, and compliance documentation.
🔧 MEP Coordination
Mechanical, electrical, and plumbing engineers need accurate as-built plans to design new systems that integrate with existing infrastructure.
The Challenge: Buildings Rarely Match Original Drawings
Here's the problem: existing buildings rarely match their original construction drawings. Over time, walls get moved, doors get relocated, windows get replaced, and rooms get reconfigured. Original drawings from 20, 30, or 50 years ago are often inaccurate or missing entirely.
This is why laser scanning has become the gold standard for as-built documentation. A laser scan captures the building exactly as it exists today, to within a few millimeters with a good terrestrial scanner (a centimeter or two with most handheld ones). But the scan itself is just raw data—you still need to convert it into usable CAD drawings.
The Traditional As-Built Workflow: Field → Scan → Manual Drafting
For decades, creating as-built floor plans has followed the same labor-intensive process. Let's break down each step and understand why it's so time-consuming and expensive.
Step 1: Field Scanning (1-2 Days)
The process begins in the field with laser scanning. A surveyor or technician:
- Sets up the scanner at multiple positions throughout the building
- Captures scans from each position (typically 10-50 scans per floor, depending on building size)
- Registers scans using targets or cloud-to-cloud registration
- Exports point cloud in E57, LAS, LAZ, or PLY format
For a typical 500m² office space, this might involve:
- 20-30 scan positions
- 4-6 hours of scanning time
- 1-2 hours of registration and quality checking
- Total field time: 1 full day
Field Scanning Costs:
- Surveyor/technician time: $500-$1,500/day
- Equipment rental (if not owned): $200-$500/day
- Travel and setup: $200-$500
- Total field cost: $900-$2,500 per project
Step 2: Point Cloud Processing (2-4 Hours)
Back in the office, the raw scan data needs processing:
- Import scans into registration software (Leica Cyclone, Faro Scene, Trimble RealWorks)
- Register and align all scan positions
- Clean point cloud (remove noise, unwanted objects)
- Export unified point cloud for CAD import
This step typically takes 2-4 hours for a medium-sized project, depending on scan quality and registration complexity.
Step 3: Format Conversion (30-60 Minutes)
AutoCAD and Revit work with point clouds in Autodesk's ReCap formats (RCP/RCS), not with raw E57 or LAS files, so the usual route is to convert them in Autodesk ReCap Pro first:
- Import E57/LAS/PLY into ReCap Pro
- Convert to RCP (ReCap Project) format
- Export to RCS (ReCap Scan) for Revit, or use ReCap directly in AutoCAD
⚠️ ReCap License Required: Autodesk ReCap Pro is a separate paid license (a few hundred dollars a year; check Autodesk's site for the current price). This adds cost for smaller firms or occasional users.
Step 4: Manual Drafting in CAD (1-2 Weeks)
This is where the real time investment happens. A CAD technician manually traces the point cloud:
- Import point cloud into AutoCAD or Revit
- Set up drawing layers (walls, doors, windows, dimensions, annotations)
- Manually trace walls by following the point cloud
- Identify and draw doors (measuring openings, swing directions)
- Identify and draw windows (measuring openings, sill heights)
- Add dimensions to all walls and openings
- Add room labels and annotations
- Clean up geometry (fix gaps, align walls, correct angles)
- Quality check against point cloud
- Final review and export to DXF/DWG
For a typical 500m² office space, manual drafting takes:
Time Breakdown for Manual As-Built Drafting:
- Wall tracing: 8-12 hours
- Door/window identification and drawing: 4-6 hours
- Dimensioning: 2-3 hours
- Room labeling and annotations: 1-2 hours
- Cleanup and refinement: 3-5 hours
- Quality checking: 2-3 hours
- Total: 20-31 hours (2.5-4 days)
For larger commercial spaces (1,000m²+), this can easily stretch to 1-2 weeks of full-time work.
Step 5: Quality Control and Revisions (4-8 Hours)
After initial drafting, the drawings go through quality control:
- Review against point cloud for accuracy
- Check dimensions and measurements
- Verify door/window locations and sizes
- Client review and revision requests
- Final corrections and updates
This typically adds another 4-8 hours to the project timeline.
Total Time and Cost: Traditional Workflow
For a typical 500m² office space as-built project:
| Phase | Time | Cost (at $40/hr) |
|---|---|---|
| Field Scanning | 1 day | $900-$2,500 |
| Point Cloud Processing | 2-4 hours | $80-$160 |
| Format Conversion (ReCap) | 30-60 min | $20-$40 |
| Manual Drafting | 20-31 hours | $800-$1,240 |
| Quality Control | 4-8 hours | $160-$320 |
| TOTAL | 1-2 weeks | $1,960-$4,260 |
This doesn't include software licenses: ReCap Pro (a few hundred dollars a year) and AutoCAD or Revit ($2,000+ a year each). For a firm doing several as-built projects a year, those licenses are a fixed cost on top of every project.
💡 Example: at the top of the range above, 31 hours of drafting plus 8 hours of quality control is a full working week for one technician. At $40/hour, that's $1,560 in labor costs alone—not including field scanning, software licenses, or overhead.
The Modern Workflow: Field → Scan → AI-Assisted Drafting
What if you could skip most of the manual drafting time? That's where AI-powered point cloud conversion comes in.
The modern workflow uses the same field scanning process, but replaces manual CAD tracing with automated modeling. Here's how it works:
Step 1: Field Scanning (Same as Traditional)
The field scanning process remains the same—you still need to capture accurate point cloud data. No changes here.
Step 2: Point Cloud Processing (Same as Traditional)
Registration and cleaning still happen in your scanning software. No changes here either.
Step 3: AI-Powered Conversion (Usually Within a Few Hours)
Instead of tracing by hand, you upload your point cloud to an AI-powered conversion tool like ScanToBIM-CAD, our point cloud to BIM software:
- Upload the point cloud directly (E57, LAS, LAZ, or PLY—no ReCap conversion needed!)
- The AI finds the stories in the scan and models walls (straight, diagonal and curved), doors, windows, floor slabs, ceilings, roofs, columns and stairs, inside and out
- The model is checked against your points before it is delivered
- Your scan is viewable in 3D within minutes; the model usually arrives within a few hours (in October 2026, typically about 3 hours after upload)
Building services (pipes, ducts, electrical) and furniture are not modeled.
⚡ Key Advantage: No ReCap license needed! ScanToBIM-CAD accepts E57, LAS, LAZ, and PLY files directly, so the conversion needs no extra software.
Step 4: Download Your Files
Once the model is ready, you download three files of the whole building:
- Revit model (RVT) - A native Revit file: opens in Revit 2024 or later with no IFC import step
- IFC file - 3D BIM model for ArchiCAD and other BIM tools, and for older versions of Revit
- DXF file - 2D floor plan for every story, ready for AutoCAD or any CAD software
Step 5: Refine in Your CAD Software (1-3 Hours)
Open the DXF in your CAD software (AutoCAD, LibreCAD, etc.), or the RVT in Revit, to review and refine the generated geometry:
- Review the modeled walls, doors, windows, slabs, and roofs
- Fix anything the scan covered poorly
- Add missing elements the AI might have missed
- Verify dimensions and measurements against the point cloud
- Add room labels and annotations
- Add title blocks and project information
- Final quality check
This refinement step typically takes 1-3 hours, compared to 20-31 hours of manual drafting. The AI does the tracing, and you focus on quality control and final touches in your familiar CAD environment.
Total Time and Cost: Modern AI Workflow
For the same 500m² office space project:
| Phase | Time | Cost |
|---|---|---|
| Field Scanning | 1 day | $900-$2,500 |
| Point Cloud Processing | 2-4 hours | $80-$160 |
| AI Conversion (ScanToBIM-CAD) | A few hours, unattended | $29 per scan* |
| Review & Refinement | 1-3 hours | $40-$120 |
| Finalization | 30 min | $20 |
| TOTAL | 1.5-3.5 hours** | $1,069-$2,829 |
*ScanToBIM-CAD pricing: $29 per scan for the Revit (RVT), IFC and DXF files, any number of stories. You order the model when you upload, and your card is charged only when the model is delivered; if the AI can't produce a reliable model, nothing is charged. Uploading and viewing your scan in 3D are free.
**Your drafting time only (review and finalization); the model itself is made unattended, usually within a few hours. Field scanning and point cloud processing are the same for both workflows.
Cost Comparison: Traditional vs Modern Workflow
Let's compare the total costs for a typical 500m² as-built project:
| Cost Category | Traditional | Modern AI | Savings |
|---|---|---|---|
| Field Scanning | $900-$2,500 | $900-$2,500 | — |
| Point Cloud Processing | $80-$160 | $80-$160 | — |
| Format Conversion | $20-$40 | $0* | $20-$40 |
| Drafting Labor | $800-$1,240 | $40-$120 | $760-$1,120 |
| Quality Control | $160-$320 | $20 | $140-$300 |
| AI Model (Revit, IFC, DXF) | — | $29** | -$29 |
| TOTAL (per project) | $1,960-$4,260 | $1,069-$2,829 | $891-$1,431 |
*No ReCap needed—ScanToBIM-CAD accepts E57/LAS/LAZ/PLY directly
**ScanToBIM-CAD: $29 per scan for the Revit (RVT), IFC and DXF files of the whole building, any number of stories, charged only when the model is delivered. Software licenses are left out of both totals: both workflows still need your own CAD or BIM software (AutoCAD, Revit) to finish the drawings, and only the manual route needs ReCap Pro.
💰 Cost Savings Summary:
- Per project savings: $891-$1,431 (34-45% reduction)
- Software: no ReCap license for the conversion, and no subscription: $29 per scan, any number of stories
- Time savings: 19-28 hours of drafting per project (1-3 hours of review instead of 20-31 hours of tracing)
- Break-even: the $29 pays for itself if the model saves you one hour of drafting at $40/hour
Step-by-Step: Creating As-Built Floor Plans with ScanToBIM-CAD
Here's exactly how to create as-built floor plans using the modern AI-assisted workflow:
Step 1: Prepare Your Point Cloud
After completing your field scan and registration, export a unified point cloud file:
- Format: E57, LAS, LAZ, or PLY (all supported). Have a ReCap project? Export it to E57 first. FARO .fls or another scanner's native format? Export E57 from the scanner's own software.
- Size: Large scans are fine: files over 20 GB have been processed, so upload the whole building as one file
- Quality: Ensure good point density (typically 1-5mm spacing for interior scans)
💡 Pro Tip: Multi-story buildings are uploaded whole. The stories are found in the scan itself, and you get one Revit and IFC model of the whole building plus a DXF floor plan for each story, for one price.
Step 2: Upload to ScanToBIM-CAD
Go to ScanToBIM-CAD and create a free account (no card required). Uploading and viewing your scan in 3D are free. The AI model is $29 per scan for the Revit (RVT), IFC and DXF files, any number of stories, and your card is charged only when the model is delivered.
- On your dashboard, click "+ New Project"
- Drag and drop your point cloud onto the upload screen, or click to browse
- To order the AI model, click "Request AI modeling — $29 per scan" and save your card in the payment window: it is charged only when the model is delivered, and the upload starts on its own
- Keep the tab open while the file uploads; the screen shows the progress and the time remaining
You can also click "Upload and model it yourself": you view your scan in 3D and draw your own model in the editor, without a card, and can order the AI model later. Downloads of your own model (IFC, DXF and Revit) are free on your first project; for more projects, the Editor Plan is $29/month for unlimited manual projects, cancel anytime.
No ReCap conversion needed! ScanToBIM-CAD accepts E57, LAS, LAZ, and PLY files directly.
Step 3: Your Scan in 3D Within Minutes, the Model Within a Few Hours
Once uploaded:
- Your scan opens in the 3D viewer, usually within a few minutes (free)
- The AI finds the stories (floors) in the point cloud
- It models walls (straight, diagonal and curved), doors, windows, floor slabs, ceilings, roofs, columns and stairs, inside and out
- The model is checked against your points before it is delivered; if the AI can't produce a reliable model, nothing is charged
You get an email when the model is ready: usually within a few hours (in October 2026, typically about 3 hours after upload).
Step 4: Check the Model on Your Own Scan
The result page shows the model on your own point cloud, not on a sample. Before you download anything, you can:
- Drag the curtain between your scan and the model to compare them wall by wall
- Switch the scan between Color, Density and Depth views to see its shape clearly
- Show the model Solid, or use See inside (roofs off, walls see-through) to check the rooms
If something is missing, you see it here on your own points before you use the files.

Step 5: Download Your Files
The model was ordered when you uploaded, and your card is charged only when it is delivered, so the downloads are ready. You get three files of the whole building, any number of stories, for one price:
- Revit model (RVT) - A native Revit file: opens in Revit 2024 or later with no IFC import step
- IFC (3D BIM model) - For ArchiCAD, Blender and other BIM tools, and for older versions of Revit
- DXF (2D floor plan for every story) - Ready for AutoCAD (save as DWG there), LibreCAD, or any CAD software
All three come from the same model. The DXF gives you a clean 2D plan of each story for as-built documentation, while the RVT and IFC give you the full 3D model of the building. Working in Revit? Open the RVT directly, and see our guide on how to convert a point cloud to a Revit model for the whole workflow.

Step 6: Refine in Your CAD Software
Open the DXF in your CAD software (AutoCAD, LibreCAD, etc.), or the RVT in Revit, to review and finish the drawings:
- Review the modeled elements: Check that walls, doors, windows, slabs and roofs are correctly placed
- Fix weak spots: Correct anything in areas the scanner couldn't see well
- Add missing elements: Manually add any elements the AI might have missed
- Verify dimensions: Check measurements against the original point cloud for accuracy
- Add room labels (Office 101, Conference Room, etc.)
- Add dimensions to walls and openings
- Add title block with project information
- Add door/window schedules if required
- Final quality check against point cloud
This refinement step typically takes 1-3 hours, compared to 20-31 hours of manual drafting. The AI does the tracing, and you just need to make final adjustments and add annotations.
⚡ Time Savings: Even with refinement time included, you're saving 19-28 hours compared to manual drafting. The AI handles the tedious tracing work, and you focus on quality control and final touches.
Worked Example: Office Space As-Built Documentation
To illustrate the impact, here is a worked example with typical numbers (an illustration, not a specific client project):
📊 Project Details:
- Building Type: Office space
- Size: 300m² (3,200 sq ft)
- Complexity: 12 rooms, 8 doors, 6 windows
- Purpose: Renovation design project
Traditional Workflow Timeline
Using the traditional manual drafting approach:
- Field scanning: 1 day (8 hours)
- Point cloud processing: 4 hours
- ReCap conversion: 30 minutes
- Manual drafting: 8 hours (1 day)
- Quality control: 2 hours
- Total time: 22.5 hours (2.8 days)
- Total cost: $900 (at $40/hour)
Modern AI Workflow Timeline
Using the ScanToBIM-CAD AI-assisted workflow:
- Field scanning: 1 day (8 hours) - same as traditional
- Point cloud processing: 4 hours - same as traditional
- AI conversion: none of your time; the model is made unattended, usually within a few hours, and you are emailed when it is ready
- Download and refinement: 2 hours
- Finalization: 30 minutes
- Total time: 14.5 hours (1.8 days)
- Total cost: $580 (at $40/hour) + $29 (ScanToBIM-CAD) = $609
Results Comparison
✅ Time Savings
36% less time
8 hours saved (1 working day)
💰 Cost Savings
32% cheaper
$291 saved per project
In this example you save a working day of office time and $291, and the model is made while you work on something else. Expect an accuracy of 2-3 cm from the model: good for floor plans and as-built models, but not survey-grade, so check any critical dimension against the points before you issue the drawings.
Best Practices for As-Built Floor Plans
Whether you use traditional or modern workflows, here are best practices for creating accurate as-built documentation:
1. Ensure Good Scan Quality
High-quality scans produce better results:
- Point density: Aim for 1-5mm spacing for interior scans
- Coverage: Ensure all areas are captured (no blind spots)
- Registration: Use targets or cloud-to-cloud registration for accuracy
- Color data: RGB color makes the scan easier to read and check (if available)
2. Clean Your Point Cloud
Before conversion, remove unwanted elements:
- People and moving objects
- Noise and outliers
- Stray points far outside the building
- Furniture and clutter, if you trace by hand (it hides wall lines; automated conversion doesn't model furniture either way)
3. Verify AI Results
Always review AI-generated geometry:
- Check wall positions against point cloud
- Verify door and window locations
- Confirm dimensions are accurate
- Add any missing elements manually
4. Include Standard As-Built Information
Your final drawings should include:
- Room labels and numbers
- Wall dimensions
- Door and window schedules
- North arrow and scale
- Title block with project information
- Revision history (if applicable)
5. Document Limitations
Be transparent about what the as-built drawings show:
- Date of scan
- Areas not scanned (if any)
- Accuracy tolerance of the drawings (the scan itself may be more accurate; an automated model is typically 2-3 cm)
- Elements not included (furniture, building services, temporary structures, etc.)
When to Use Traditional vs Modern Workflows
Both workflows have their place. Here's when to use each:
🏗️ Use Traditional Workflow If:
- You need survey-grade precision (sub-centimeter accuracy)
- Project requires custom CAD standards
- You have in-house CAD team with time
- Client requires specific software formats
- You need building services (pipes, ducts, electrical) in the model
⚡ Use Modern AI Workflow If:
- Whole buildings, inside and out, with straight, diagonal or curved walls
- Time-sensitive projects
- Cost-sensitive projects
- Multiple projects per month
- You need a Revit model as well as floor plans
For most as-built projects, the modern AI workflow is the better choice—it's faster and cheaper, and your card is charged only when the model is delivered.
Conclusion: Cut Your As-Built Drafting Time by 90%
Creating as-built floor plans from laser scans doesn't have to take weeks or cost thousands of dollars in drafting. Modern AI-powered tools like ScanToBIM-CAD can cut your drafting time by 90% or more (1-3 hours of review instead of 20-31 hours of tracing) and total project costs by 34-45% for the 500m² office above, field scanning included.
The traditional manual drafting workflow is still viable for specialized projects, but for most as-built documentation work, the modern AI-assisted approach is faster, cheaper, and more efficient.
Key takeaways:
- ✅ Traditional workflow: 1-2 weeks, $1,960-$4,260 per project
- ✅ Modern AI workflow: model usually within a few hours + 1.5-3.5 hours of your drafting time, $1,069-$2,829 per project
- ✅ Time savings: 19-28 hours of drafting saved per project
- ✅ Cost savings: 34-45% reduction per project ($891-$1,431 saved)
- ✅ Software savings: No ReCap license needed for the conversion
- ✅ Output: Revit (RVT), IFC and DXF of the whole building from one upload
Ready to create as-built floor plans faster? Upload a scan to ScanToBIM-CAD and get the Revit, IFC and DXF files of the whole building for $29 per scan, any number of stories. Your card is charged only when the model is delivered; if the AI can't produce a reliable model, nothing is charged.
Have questions about as-built workflows or point cloud conversion? Check out our guides on how to convert point clouds to floor plans and point cloud format comparisons for more detailed information.
Ready to Convert Your Point Cloud?
Try ScanToBIM-CAD free: see your scan in 3D within minutes and your first AI floor plan preview the same day. No credit card required.
Start Free TrialRelated Posts
![How to Convert Point Cloud to Floor Plan [2026 Guide]](/_next/image?url=%2Fblog%2Fpoint-cloud-to-floor-plan%2Ffeatured-automated.jpg&w=3840&q=75)
How to Convert Point Cloud to Floor Plan [2026 Guide]
Point cloud to floor plan, step by step: trace it by hand in AutoCAD or Revit, or let AI model the whole building and download Revit, IFC and DXF files. Time and cost compared.

E57 vs LAS vs PLY: Which Point Cloud Format for Scan-to-BIM-CAD?
Choosing the right point cloud format matters. Compare E57, LAS, and PLY formats—learn which scanners export which formats, which is best for floor plan extraction, and how to convert between formats using CloudCompare.