 ScanToBIM-CAD
Interior vs Exterior Scanning: Different Tools for Different Jobs
🔍 Quick Summary:
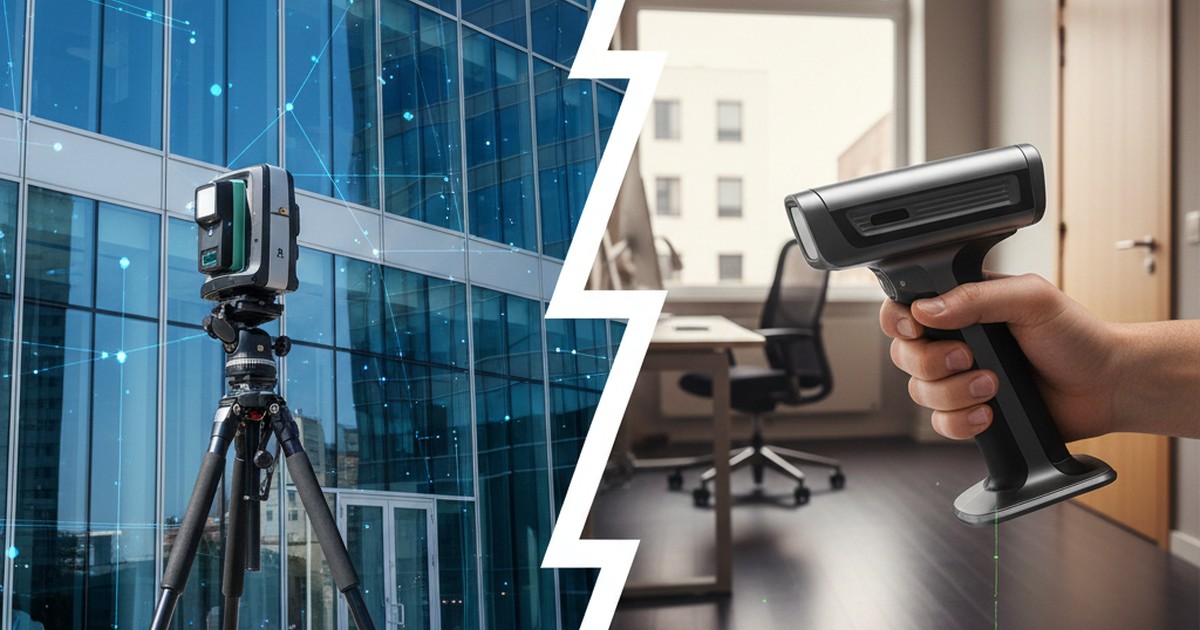
- 🏠 Interior scanning: Handheld and mobile LiDAR (GeoSLAM, BLK2GO, SatLab, NavVis) - fast, portable, ideal for floor plans
- 🏗️ Exterior scanning: Terrestrial scanners (FARO, Leica, Trimble) - high accuracy, long range, weather-resistant
- ✅ ScanToBIM-CAD: Models interiors and exteriors (walls, roofs, every story) in one model from one upload, large scans included; you get Revit (RVT), IFC and DXF files
- ⚠️ Limitations: Models are accurate to 2–3 cm (not survey-grade); building services and furniture aren't modeled
Why Interior and Exterior Scanning Are Fundamentally Different
If you've ever tried to use a terrestrial laser scanner (the kind on a tripod) to scan a building interior, you know the frustration. It's slow, requires multiple setup positions, and struggles with tight spaces and furniture.
Conversely, if you've tried to use a handheld LiDAR scanner for an exterior building survey, you've probably discovered accuracy issues, range limitations, and weather sensitivity.
That's because interior and exterior scanning are fundamentally different jobs that require different tools, workflows, and expertise. Understanding these differences is crucial for choosing the right scanner and getting the best results.
This article breaks down the key differences, which tools work best for each scenario, and when to use which approach.
Interior Scanning: Requirements and Challenges
Interior scanning is all about speed, portability, and navigating complex spaces. Here's what makes it unique:
Key Requirements
- Speed: Need to scan entire buildings quickly—often multiple floors in a single day
- Portability: Must navigate through doorways, up stairs, around furniture
- Close-range accuracy: Need precise measurements for walls, doors, windows (typically 1-3cm accuracy is sufficient)
- Furniture handling: Must work around existing furniture, equipment, and occupants
- Low light tolerance: Interiors often have poor lighting compared to exterior scans
Common Challenges
- Tight spaces: Narrow hallways, small rooms, cluttered areas
- Multiple floors: Need to scan vertically as well as horizontally
- Occupied buildings: People and moving objects create noise in point clouds
- Complex geometries: Non-orthogonal walls, curved surfaces, irregular room shapes
- Reflective surfaces: Glass, mirrors, polished floors can cause scanning issues
Best Scanners for Interior Work
For interior mobile scanning, handheld and wearable LiDAR scanners are the tools of choice:
Best for: Large interior spaces, multi-story buildings
Range: up to 100 m, Accuracy: up to 6 mm relative, Speed: Very fast
📱 Leica BLK2GO
Best for: Professional interior surveys, quick walk-through scans
Range: up to 25 m, Accuracy: 6–15 mm relative, 20 mm absolute indoors, Speed: Fast
Best for: Light handheld scanning with built-in RTK positioning
Range: about 120 m, Accuracy: about 1.5 cm, Speed: Fast
📱 NavVis VLX 3
Best for: Large commercial interiors, BIM workflows (worn, not handheld)
Accuracy: 5 mm (NavVis's figure), Speed: Very fast
Range and accuracy are the makers' published figures, checked in October 2026. "About" marks figures from SatLab's Cygnus 2 brochure; its current Cygnus pages don't list them. Relative accuracy (how well nearby points agree) is usually better than accuracy across a whole building.
Exterior Scanning: Requirements and Challenges
Exterior scanning prioritizes accuracy, range, and environmental resilience. Here's what makes it different:
Key Requirements
- Long range: Need to capture building facades, entire structures from distance
- High accuracy: Survey-grade precision often required (sub-centimeter for as-built documentation)
- Weather resistance: Must work in rain, wind, varying temperatures
- GPS integration: Often need georeferenced data for large-scale projects
- Large coverage: Need to scan entire building exteriors, sites, or multiple structures
Common Challenges
- Weather conditions: Rain, fog, wind can affect scan quality
- Sunlight: Bright sunlight can interfere with laser measurements
- Large distances: Need to capture details from 50-300m away
- Multiple scan positions: Require careful registration and alignment
- Traffic and safety: Working near roads, construction sites, public areas
Best Scanners for Exterior Work
Terrestrial laser scanners (TLS) dominate exterior scanning:
Best for: Professional exterior surveys, high accuracy
Range: up to 200 m (Premium Max: up to 400 m), Accuracy: a few mm, Speed: Medium
🏗️ Leica RTC360
Best for: Fast exterior scanning, construction sites
Range: up to 130 m, Accuracy: 1.9 mm at 10 m, Speed: Very fast
🏗️ Trimble X9
Best for: Everyday building and site scanning
Range: 0.6–150 m, Accuracy: 3.0 mm at 20 m, Speed: Fast
🏗️ Trimble X12
Best for: Large-scale exterior projects, long range
Range: up to 250 m, Accuracy: 2.2 mm at 20 m, Speed: Fast
Range and accuracy are the makers' published figures, checked in October 2026 ("a few mm" where FARO's page gives no single figure). Older models such as the FARO Focus S, Trimble TX8 and Topcon GLS-2000 are no longer on their makers' current product pages, but you'll still find them on job sites and the used market.
Comparison: Interior vs Exterior Scanning
| Factor | Interior Scanning | Exterior Scanning |
|---|---|---|
| Best Tool Type | Handheld/mobile LiDAR | Terrestrial laser scanner (TLS) |
| Typical Range | Up to about 25-120m | Up to about 130-400m |
| Accuracy Requirement | 1-3cm (sufficient for floor plans) | 1-5mm (survey-grade precision) |
| Scanning Speed | Very fast (walk-through scanning) | Medium (requires setup at each position) |
| Portability | High (handheld, backpack-mounted) | Low (tripod-mounted, heavy equipment) |
| Weather Sensitivity | Low (indoor environment) | High (rain, fog, wind affect scans) |
| GPS Integration | Not required | Often required for georeferencing |
| Typical Use Case | Floor plans, as-built documentation, BIM | Building facades, site surveys, large-scale projects |
| Cost Range | $15,000-$80,000 | $30,000-$150,000+ |
When to Use Which Tool: A Decision Framework
Use this framework to choose the right scanning approach:
Decision Framework:
Choose Handheld LiDAR (Interior) If:
- ✅ Scanning building interiors (offices, homes, commercial spaces)
- ✅ Need floor plans or as-built documentation
- ✅ Speed is important (multiple buildings in one day)
- ✅ Working in tight spaces or occupied buildings
- ✅ 1-3cm accuracy is sufficient
- ✅ Budget is limited ($15k-$50k range)
Choose Terrestrial Scanner (Exterior) If:
- ✅ Scanning building exteriors or facades
- ✅ Need survey-grade precision (sub-centimeter)
- ✅ Large-scale projects (multiple buildings, sites)
- ✅ Georeferenced data required
- ✅ Long-range scanning needed (50m+)
- ✅ Working in outdoor environments
Use Both (Hybrid Approach) If:
- ✅ Complete building documentation (interior + exterior)
- ✅ Need both floor plans and facade documentation
- ✅ Budget allows for multiple tools
- ✅ Project requires comprehensive as-built documentation
ScanToBIM-CAD: Interiors and Exteriors in One Model
ScanToBIM-CAD turns a point cloud into a model of the building. The scan can come from a handheld, wearable or tripod scanner, or from several scans registered together: upload it as E57, LAS, LAZ or PLY, and the AI models the inside and the outside of the building.
✅ Interiors and Exteriors Together
Interior walls, exterior walls and roofs come back in the same model, with doors, windows, floor slabs, ceilings, columns and stairs.
✅ Any Wall Shape
Straight, diagonal and curved walls are all modeled. Your building doesn't need square rooms.
✅ The Whole Building From One Upload
Stories are found in the scan, and every floor comes back in one model. Large files are fine: scans over 20 GB have been processed.
✅ Revit, IFC and DXF
A native Revit model (RVT) that opens in Revit 2024 or later with no IFC import step, an IFC model for ArchiCAD and older Revit versions, and a DXF floor plan for every story.
On the result page, you check the model on your own point cloud: drag a curtain between the scan and the model, switch between Color, Density and Depth views, and look at the model Solid or with See inside. The model usually arrives within a few hours (in October 2026, typically about 3 hours after upload).

Our Honest Limitations
At ScanToBIM-CAD, we're transparent about what we don't do. Here's what to know before you upload:
- Not survey-grade: Our models are accurate to 2–3 cm. That's right for floor plans and as-built models, but not for survey-grade or legal work. For those, measure in the point cloud or model by hand with the tools below.
- No building services or furniture: Pipes, ducts, electrical and furniture aren't modeled. The model holds the building itself.
- Very noisy scans need cleaning first: Heavy noise (people walking through, reflections from glass and mirrors, stray points far outside the building) can confuse the AI. Clean it in your scanner's software or CloudCompare before you upload. If the AI can't produce a reliable model, nothing is charged.
- We don't scan buildings: You bring the point cloud. If you don't own a scanner, hire a local scanning provider and ask for an E57 export.
Alternative Tools for Exterior Scanning Workflows
However you model, exterior scans need registration and cleaning first, and survey-grade facade detail is still drawn by hand in CAD/BIM software. These are the usual tools:
Point Cloud Processing Software
- CloudCompare: Free, open-source point cloud processing. Excellent for registration, cleaning, and analysis of large exterior scans.
- Autodesk ReCap Pro: Industry standard for point cloud registration and processing. Creates the RCP/RCS files that AutoCAD and Revit attach as point clouds, and exports E57.
- Leica Cyclone: Professional software for Leica scanner data. Best for complex registration and georeferencing.
- FARO SCENE: Native software for FARO scanners. Excellent for exterior scan processing and registration, and exports E57.
CAD/BIM Software for Exterior Work
- AutoCAD with Leica CloudWorx: Plugin for working with large point clouds in AutoCAD. Best for detailed facade drawings.
- Revit with Point Cloud Tools: Native point cloud support in Revit. Good for adding facade detail by hand to a model created from your scan.
Hybrid Approaches: Combining Interior and Exterior Data
Many projects need both the rooms and the outside of the building. The useful hybrid is simple: scan each part with the right tool, register the scans into one point cloud, and get one model.
Workflow Example: Complete Building Documentation
- Interior scanning: Walk the rooms with a handheld or wearable scanner (GeoSLAM, BLK2GO, NavVis). It's fast and reaches every corner.
- Exterior scanning: Capture the facades, roof edges and site with a terrestrial scanner (FARO, Leica, Trimble). This provides georeferenced, high-accuracy exterior data.
- Registration: Align the interior and exterior point clouds in your registration software (FARO SCENE, Leica Cyclone, CloudCompare) using common reference points (doorways, windows, building corners) or targets.
- Export one combined point cloud: Export the registered scan as a single E57, LAS, LAZ or PLY file, with the whole building in it: inside, outside, every floor.
- Upload once, get one model: Upload the file to ScanToBIM-CAD. You get one model of the whole building, with interior walls, exterior walls and roofs: a native Revit model (RVT), an IFC model and a DXF floor plan for every story.
One upload, one model: fast interior capture, accurate exterior data, and no separate models to stitch together afterward.

Best Practices for Each Scanning Type
Interior Scanning Best Practices
- Walk at consistent speed: Handheld scanners work best with steady, consistent movement
- Overlap your paths: Walk through each room multiple times from different angles to ensure complete coverage
- Close doors: Helps with room boundary detection and reduces point cloud noise
- Minimize moving objects: Ask occupants to stay still during scanning when possible
- Scan vertically: Include ceiling and floor in your scanning path for better 3D reconstruction
Exterior Scanning Best Practices
- Plan scan positions: Pre-plan your scan positions to ensure complete coverage and good overlap
- Use targets: Place reflective targets for easier registration between scan positions
- Check weather: Avoid scanning in rain, fog, or extreme sunlight
- Georeference early: Set up GPS/GNSS control points at the start of the project
- Document conditions: Note weather, lighting, and any obstructions that might affect scan quality
Conclusion: Choose the Right Tool for the Job
Interior and exterior scanning are fundamentally different jobs that require different tools and approaches:
- Interior scanning: Handheld LiDAR excels—fast, portable, perfect for floor plans
- Exterior scanning: Terrestrial scanners dominate—high accuracy, long range, weather-resistant
- Hybrid approach: Use both for complete building documentation
At ScanToBIM-CAD, we model both. Upload an interior scan, an exterior scan, or one registered point cloud of both, and you get one model of the whole building: interior and exterior walls, roofs, doors, windows, slabs, ceilings, columns and stairs, on every story.
If you need survey-grade precision, model by hand with the specialized tools above: our models are accurate to 2–3 cm, which is right for floor plans and as-built models but not for survey work.
Ready to turn your scans into a model? Upload your point cloud to ScanToBIM-CAD and view it in 3D for free. Order the AI model and you get a native Revit model (RVT), an IFC model and a DXF floor plan for every story, for $29 per scan, any number of stories, charged only when the model is delivered.
Want to learn more? Check out our guides on handheld LiDAR floor plans and FARO scanner workflows.
Ready to Convert Your Point Cloud?
Try ScanToBIM-CAD free: see your scan in 3D within minutes and your first AI floor plan preview the same day. No credit card required.
Start Free TrialRelated Posts

How to Create Floor Plans from Handheld LiDAR Scans
Handheld LiDAR floor plans, step by step: handheld vs tripod scanners, popular devices (SatLab, GeoSLAM, BLK2GO, NavVis), and the workflow from scan to a native Revit model, an IFC model and DXF floor plans of the whole building. Includes best practices and troubleshooting tips.

Faro Scanner to Floor Plan: Automated Workflow
How to turn a FARO scan into a floor plan: register and export E57 in FARO SCENE, then upload the whole building once for a native Revit model, an IFC model and DXF floor plans of every story. Manual tracing vs automated modeling on time, cost and accuracy.