 ScanToBIM-CAD
Faro Scanner to Floor Plan: Automated Workflow
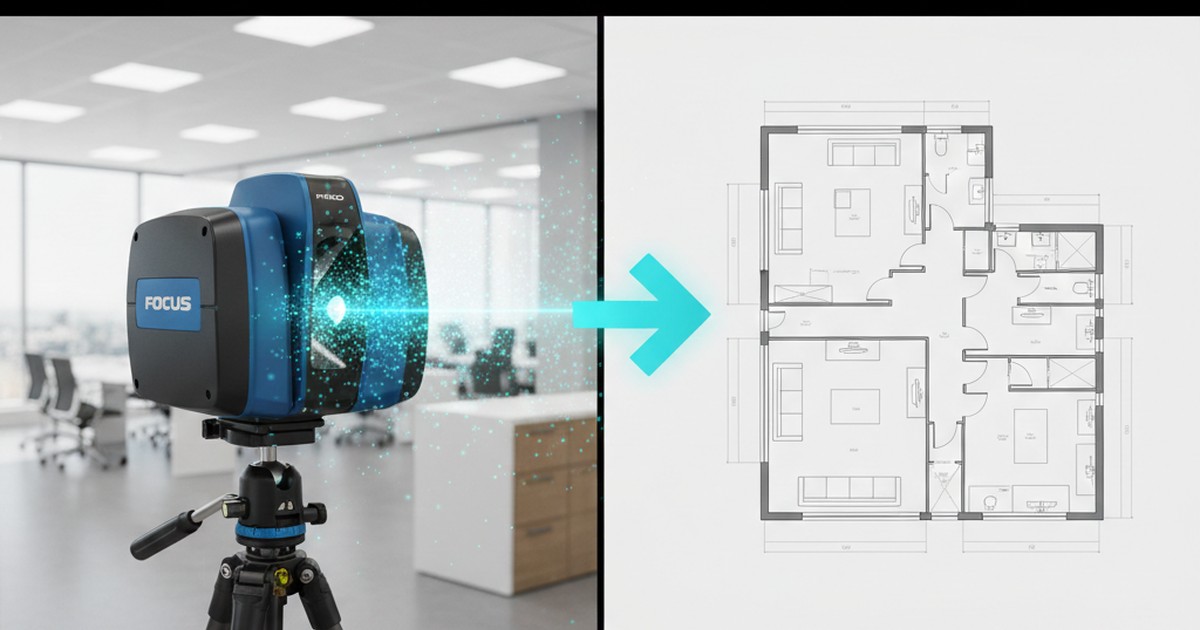
📋 Quick Summary:
- ✅ FARO scanners: Industry-leading tripod scanners for high-precision as-built documentation
- ✅ Export formats: FARO SCENE stores scans as FLS (native); export E57 for floor plan conversion (LAS, LAZ and PLY also work)
- ✅ Workflow: Scan → Register in FARO SCENE → Export E57 → Upload the whole building once → Check the model on your scan → Download Revit, IFC and DXF
- ✅ Best for: High-accuracy as-built capture, from houses to large commercial spaces
- ✅ Time savings: Automated model usually within a few hours (in October 2026, typically about 3 hours) vs manual tracing (8-20 hours of work)
- ✅ Model accuracy: 2–3 cm: right for floor plans and as-built models, not survey-grade
FARO scanners are among the most trusted tools in the laser scanning industry. Used by surveyors, architects, and construction professionals worldwide, FARO's tripod-mounted scanners deliver survey-grade scan data and are the go-to choice for high-precision as-built documentation. But once you've captured that high-quality point cloud, how do you efficiently convert it into a usable floor plan?
In this guide, we'll walk through the complete workflow from FARO scanner to floor plan—from exporting point clouds in FARO SCENE to getting a native Revit model, an IFC model and DXF floor plans of the whole building with automated tools.
What is a FARO Scanner? Overview of the Product Line
FARO Technologies is a leading manufacturer of 3D measurement and imaging solutions. Their laser scanning products are widely used in architecture, engineering, construction, and surveying for creating accurate as-built documentation.
FARO Focus Series (Tripod Scanners)
The FARO Focus series is FARO's flagship line of tripod-mounted laser scanners, known for their high accuracy and reliability:
🎯 FARO Focus S
- Entry-level professional scanner
- Range: Up to 70m
- Ranging error (scanner spec): ±1mm
- Best for: Small-to-medium projects
🎯 FARO Focus Premium
- High-performance scanner
- Range: Up to 350m
- Ranging error (scanner spec): ±1mm
- Best for: Large commercial spaces
FARO Focus scanners capture millions of 3D points per scan position, creating highly detailed point clouds with color (RGB) data when using the built-in camera. They're designed for stationary scanning—you set up the tripod, start the scan, and move to the next position.
FARO Freestyle (Handheld Scanner)
The FARO Freestyle is FARO's handheld scanner for close-range work. FARO now lists the Freestyle 2 under legacy hardware, but many are still in use:
- Type: Handheld close-range scanner
- Range: 0.4–5 m (up to 10 m with lower data quality)
- Accuracy: About 0.5 mm at 1 m and 5 mm at 5 m (FARO's Freestyle 2 tech sheet)
- Best for: Tight spaces, details, small rooms
- Workflow: Sweep the scanner across surfaces as you move
To walk through a whole building while scanning, FARO's current option is the FARO Orbis mobile scanner. It uses SLAM (it maps the space as you walk), and FARO quotes about 5 mm precision while moving and a range of 120 m. Orbis data is processed in FARO Connect, which exports E57, LAS, LAZ and PLY.
💡 Freestyle vs Orbis vs Focus: The Freestyle suits close-range detail, the Orbis fast walk-through capture, and Focus scanners precision on large-scale projects. Freestyle and Focus data go through FARO SCENE; all three can give you an E57 file for floor plan conversion.
FARO Software Ecosystem
FARO Focus and Freestyle scanners work with FARO SCENE, the company's comprehensive point cloud processing software. FARO SCENE handles:
- Scan registration (aligning multiple scan positions)
- Point cloud visualization and editing
- Export to standard formats (E57 and others)
- Measurement and annotation tools
- Integration with CAD/BIM software
Typical Export Formats from FARO Scanners
FARO SCENE can export point clouds in several industry-standard formats. Here's what you need to know about each:
1. FLS Format (FARO Native)
FLS is FARO's proprietary format, used for storing raw scan data:
- ✅ Preserves all scan metadata (position, orientation, settings)
- ✅ Includes color (RGB) data from built-in camera
- ✅ Compressed format (smaller file sizes)
- ❌ Not directly compatible with most CAD software
- ❌ Requires conversion to E57/LAS for CAD workflows
⚠️ FLS Limitation: Most CAD conversion tools (including ScanToBIM-CAD) don't accept FLS files directly. You'll need to export from FARO SCENE to E57 (or LAS, LAZ or PLY) first.
2. E57 Format (Recommended)
E57 is the industry standard for terrestrial laser scanning data:
- ✅ Industry standard format
- ✅ Preserves color (RGB) and intensity data
- ✅ Includes metadata (scan positions, timestamps)
- ✅ Compatible with all major CAD and point cloud software
- ✅ Works directly with ScanToBIM-CAD
Best choice for floor plan conversion because it preserves all necessary data and is widely supported.
3. LAS Format
LAS (LiDAR Aerial Survey) is another standard format:
- ✅ Widely used in surveying and GIS
- ✅ Good compression (LAZ variant)
- ✅ Preserves intensity data
- ✅ Accepted by ScanToBIM-CAD (LAS and LAZ)
- ⚠️ May not preserve color (RGB) data in all cases
4. RCP/RCS Format (Autodesk ReCap)
RCP/RCS formats are used by Autodesk ReCap software:
- ✅ Native format for Autodesk workflows
- ✅ Can be imported directly into AutoCAD and Revit
- ❌ Requires an Autodesk ReCap Pro license (about $400/year)
- ❌ Not accepted by ScanToBIM-CAD: export the ReCap project to E57 first
5. PLY Format
PLY is a simple, widely-supported format:
- ✅ Simple format, easy to work with
- ✅ Can include color data
- ✅ Compatible with ScanToBIM-CAD
- ⚠️ May not preserve all metadata
✅ Recommended Export Format: For floor plan conversion, export from FARO SCENE to E57 format. It preserves all necessary data (color, metadata) and works directly with ScanToBIM-CAD and other conversion tools. For a closer comparison of the formats, see E57 vs LAS vs PLY.
Why Use FARO for As-Built Floor Plans?
FARO scanners are an excellent choice for creating as-built floor plans. Here's why:
🎯 High Accuracy
Millimeter-level ranging gives sharp, dense walls and openings to draw from
📐 Survey-Grade Precision
Meets professional surveying standards for as-built documentation and property records
🏢 Large-Scale Projects
350m range (Focus Premium) allows scanning of large commercial and industrial spaces
🎨 Color Data
Built-in camera captures RGB color, so you can check a model against a scan that looks like the real building
Common Use Cases
- As-built documentation: Creating accurate records of existing buildings for renovation or legal purposes
- Construction verification: Comparing built conditions to design drawings
- Facility management: Maintaining up-to-date floor plans for large commercial buildings
- Historic preservation: Documenting historic structures with high precision
- Surveying: Creating survey-grade floor plans for property records
⚠️ Scanner accuracy is not model accuracy: The 1 mm figures above are FARO's specs for the scanner itself. A model drawn automatically from the scan is less precise: ScanToBIM-CAD models are accurate to 2–3 cm, which is right for floor plans and as-built models but not for survey-grade or legal work. For those, measure directly in the point cloud or trace by hand.
Step-by-Step: Exporting Point Clouds from FARO SCENE
Here's the complete workflow for exporting your FARO scan data for floor plan conversion:
Step 1: Register Scans in FARO SCENE
Before exporting, ensure all scan positions are properly registered (aligned):
- Open FARO SCENE and load your scan project
- Review scan positions in the 3D view
- Run automatic registration (if not already done)
- Manually adjust any misaligned scans if needed
- Verify registration quality (check for gaps, overlaps, alignment errors)
💡 Registration Tips:
- Good registration is critical for accurate floor plans
- Ensure sufficient overlap between scan positions (30-50% recommended)
- Check for registration errors in the quality report
- Fix any misalignments before exporting
Step 2: Clean and Prepare Point Cloud
Before exporting, clean up the point cloud:
- Remove unwanted objects: Delete furniture, temporary objects, or clutter if not needed for floor plan
- Filter noise: Remove outliers and low-quality points
- Crop far-off points: Remove trees, cars and neighboring buildings, but keep every floor and the building's outside: the whole building goes in one upload
- Verify point density: Ensure adequate coverage for accurate wall detection
Step 3: Export to E57 Format
Export your registered and cleaned point cloud:
- In FARO SCENE, select the scans you want to export (all floors: one file for the whole building)
- Go to File → Export → Point Cloud
- Choose E57 as the export format
- Configure export settings:
- Point spacing: 1-5mm is typically sufficient for floor plans
- Include color: Yes (a colored scan makes it easy to check the model against it)
- Coordinate system: Use project coordinate system or local coordinates
- Click Export and wait for processing (time depends on point cloud size)
- Save the E57 file to your computer
⏱️ Export Time: For a typical 500m² scan with 1mm spacing, export takes 5-15 minutes depending on your computer's performance.
Step 4: Convert to Floor Plan with ScanToBIM-CAD
Now turn the exported E57 file into a model and floor plans with ScanToBIM-CAD:
- Go to ScanToBIM-CAD and sign in (or create a free account)
- On your dashboard, click "+ New Project"
- Drop your E57 file on the upload box ("Drop point cloud to start") or click it to browse. Upload the whole building as one file, whatever its size: files over 20 GB have been processed
- To order the AI model ($29 per scan), click "Request AI modeling — $29 per scan" and save your card in the payment window: it is charged only when the model is delivered, and the upload starts on its own
- Keep the tab open until the upload finishes. Your scan opens in 3D in the browser within minutes, and the AI finds the stories and models the whole building: straight, diagonal and curved walls, doors, windows, floor slabs, ceilings, roofs, columns and stairs, inside and out
- We email you when the model is ready: usually within a few hours (in October 2026, typically about 3 hours)
Check the model on your own scan. The result page shows your point cloud on the left and the generated model on the right. Drag the curtain between them to compare wall by wall, switch the scan between Color, Density and Depth views, and look at the model Solid or with See inside (roofs off and walls see-through, so the rooms show).

Download. When the model is delivered, your card is charged $29 for the scan (any number of stories, one price) and you download the native Revit model (RVT), the IFC model and a DXF floor plan for every story. If the AI can't produce a reliable model, nothing is charged.

✅ Result: You now have:
- ✅ A native Revit model (RVT) of the whole building: opens in Revit 2024 or later with no IFC import step
- ✅ An IFC model for ArchiCAD, Blender, older Revit versions and other BIM software
- ✅ A DXF floor plan for every story: opens in AutoCAD (save it as DWG there if you need DWG)
- ✅ Walls, doors, windows, floor slabs, ceilings, roofs, columns and stairs, inside and out
- ✅ Accuracy of 2–3 cm: right for floor plans and as-built models, not survey-grade
- ❌ Not modeled: building services (pipes, ducts, electrical) and furniture
Alternative: Manual Tracing Workflow
If you prefer manual tracing (or need very specific customization), here's the traditional workflow:
- Export from FARO SCENE to RCP format (requires Autodesk ReCap Pro)
- Import RCP into AutoCAD or Revit using ReCap plugin
- Manually trace walls, doors, and windows in CAD software
- Add dimensions, room labels, and annotations
- Export final floor plan to DXF/DWG
⚠️ Time Investment: Manual tracing takes 8-20 hours of work for a typical 500m² project, while an automated model usually arrives within a few hours with no drafting on your side. The manual approach also requires AutoCAD/Revit licenses ($2,000+/year) and ReCap Pro (about $400/year).
Comparison: Manual Tracing vs Automated Conversion
Let's compare the two approaches to getting floor plans from FARO scans:
| Factor | Manual Tracing (AutoCAD/Revit) | Automated (ScanToBIM-CAD) |
|---|---|---|
| Time Required | 8-20 hours of drafting | ✅ Usually within a few hours (typically about 3 hours in October 2026); your part is the upload and the check |
| Cost | $400-$1,000 (labor) + software licenses | ✅ $29 per scan (all floors), charged only when the model is delivered (no subscription) |
| Accuracy | As precise as the scan and the drafter allow (survey-grade possible) | 2–3 cm (floor plans and as-built models, not survey-grade) |
| Consistency | ❌ Varies by operator | ✅ Consistent results |
| Elements Modeled | Whatever you trace, by hand (time-consuming) | ✅ Walls (straight, diagonal, curved), doors, windows, slabs, ceilings, roofs, columns, stairs |
| Skill Required | High (CAD expertise needed) | ✅ Low (upload, check and download) |
| Software Required | FARO SCENE + ReCap Pro + AutoCAD/Revit ($2,400+/year) | ✅ FARO SCENE (for the E57 export) + a web browser |
| 3D BIM Model | ❌ Not included (must create separately) | ✅ Native Revit (RVT) and IFC included |
| Scalability | ❌ Limited (one at a time) | ✅ As many scans as you need, $29 each |
💰 Cost Comparison Example (one 500m² FARO project):
- Manual tracing: 12 hours × $50/hour = $600 per project
- Software licenses: ReCap Pro (about $400/year) + AutoCAD (about $2,000/year) = about $2,400/year
- Automated (ScanToBIM-CAD): $29 per scan, all floors, charged only when the model is delivered
- Savings: $571 per project (95% cost reduction) + no ReCap Pro or CAD license needed to produce the plan
Common Roadblocks and Solutions
Here are common issues you might encounter when converting FARO scans to floor plans, and how to solve them:
Roadblock 1: Registration Errors
Symptoms: Point cloud has gaps, misaligned sections, or duplicate geometry
Solutions:
- Improve scan overlap: Ensure 30-50% overlap between scan positions
- Use targets: Place FARO targets or checkerboard targets for better registration
- Check scan quality: Verify each scan position captured sufficient data
- Manual registration: Use FARO SCENE's manual registration tools for difficult areas
- Re-scan if needed: For severe registration issues, re-scan problematic areas
Roadblock 2: Accuracy Issues
Symptoms: Floor plan dimensions don't match known measurements or expected values
Solutions:
- Verify scanner calibration: Ensure the FARO scanner is properly calibrated
- Check coordinate system: Verify correct coordinate system in FARO SCENE
- Compare against known measurements: Measure door widths, room dimensions to verify accuracy
- Review registration quality: Poor registration can cause accuracy issues
- Check for scale errors: Verify export settings preserve correct scale
- Know the model's tolerance: Automated models are accurate to 2–3 cm; for tighter checks, measure in the point cloud itself
Roadblock 3: Large File Sizes
Symptoms: E57 files are very large (several GB) and slow to upload
Solutions:
- Upload it as one file: There is no size limit, and files over 20 GB have been processed. Keep the browser tab open until the upload finishes
- Reduce point spacing: Export with 2-5mm spacing instead of 1mm (still sufficient for floor plans) for a faster upload
- Crop far-off points: Remove trees, cars and neighboring buildings, but keep the building's exterior: outside walls and roofs are modeled too
- Use compressed formats: E57 is already compressed; if you export LAS, LAZ (compressed LAS) is much smaller and is also accepted
Roadblock 4: Missing or Incorrect Wall Detection
Symptoms: AI-generated floor plan is missing walls or has incorrect wall positions
Solutions:
- Check point cloud density: Ensure walls have adequate point coverage (1-5mm spacing recommended)
- Verify scan coverage: Make sure all walls were captured during scanning
- Include color data: A colored scan makes it much easier to see where the model and the scan disagree—ensure the E57 export includes color
- Check the model: Compare it with your point cloud on the result page (drag the curtain) before you use the files
- Manual refinement: Add missing walls in Revit or CAD (still faster than full manual tracing)
- No reliable model, no charge: If the AI can't produce a reliable model, nothing is charged
Roadblock 5: FLS Format Not Supported
Symptoms: Conversion tool doesn't accept FLS files
Solution: Export from FARO SCENE to E57 (or LAS, LAZ or PLY) first. Most conversion tools (including ScanToBIM-CAD) don't accept FLS directly because it's FARO's proprietary format.
Best Practices for Clean Exports and Reliable Plans
Follow these best practices to get the best results when converting FARO scans to floor plans:
1. Scanning Best Practices
- ✅ Plan scan positions: Ensure 30-50% overlap between positions
- ✅ Use targets: Place FARO targets or checkerboard targets for better registration
- ✅ Capture all areas: Don't skip rooms, corridors, or important spaces
- ✅ Check scan quality: Review each scan position for completeness
- ✅ Include color: Use FARO's built-in camera to capture RGB color data
2. Registration Best Practices
- ✅ Verify registration quality: Check FARO SCENE's registration report for errors
- ✅ Fix misalignments: Manually adjust any poorly registered scans
- ✅ Check for gaps: Ensure no missing areas in registered point cloud
- ✅ Verify coordinate system: Use consistent coordinate system throughout project
3. Export Best Practices
- ✅ Use E57 format: Best compatibility and data preservation
- ✅ Include color data: A colored scan makes checking the model easy
- ✅ Appropriate point spacing: 1-5mm is sufficient for floor plans (don't need 1mm for every project)
- ✅ One file for the whole building: All floors come back in one model, for one price
- ✅ Crop far-off points: Remove trees, cars and neighboring buildings, but keep the building's exterior
4. Conversion Best Practices
- ✅ Review AI results: Always check the model against your scan on the result page before downloading
- ✅ Verify key measurements: Check door widths, room dimensions against point cloud
- ✅ Refine in Revit or CAD: Make final adjustments in your familiar environment
- ✅ Add annotations: Room labels, dimensions, title blocks, etc.
- ✅ Quality check: Compare final floor plan against original point cloud
5. CAD Refinement Best Practices
- ✅ Open the files: RVT in Revit 2024 or later, IFC in ArchiCAD, Blender or older Revit versions, DXF in AutoCAD or other CAD software
- ✅ Fix AI errors: Correct any detection mistakes
- ✅ Add missing elements: Manually add anything the AI missed
- ✅ Verify dimensions: Check all measurements against point cloud
- ✅ Add standard elements: Title block, north arrow, scale, room labels
- ✅ Layer organization: Ensure walls, doors, windows are on appropriate layers
Conclusion: Get a Floor Plan from Your FARO Scan Without Tracing
FARO scanners deliver the precision and reliability needed for professional as-built documentation. Combined with automated conversion tools like ScanToBIM-CAD, you can turn those high-quality point clouds into a Revit model, an IFC model and DXF floor plans of the whole building, usually within a few hours instead of 8-20 hours of tracing.
Key takeaways:
- ✅ FARO scanners: Industry-leading tripod scanners for high-precision as-built documentation
- ✅ Export format: E57 is the best choice—preserves all data and works with conversion tools
- ✅ Complete workflow: Scan → Register → Export E57 → Upload the whole building once → Check → Download → Refine
- ✅ Time savings: The automated model usually arrives within a few hours (typically about 3 hours in October 2026) vs 8-20 hours of manual tracing
- ✅ Cost savings: $29 per scan, all floors, vs $400-$1,000 of tracing labor (93-97% less)
- ✅ Know the accuracy: Automated models are accurate to 2–3 cm: right for floor plans and as-built models, not for survey-grade work
Ready to turn your FARO scan into a floor plan? Upload your FARO E57 export to ScanToBIM-CAD and view it in 3D for free. Order the AI model and your card is charged only when it is delivered: you get a native Revit model (RVT), an IFC model and a DXF floor plan for every story of the whole building, for $29 per scan, any number of floors.
Have questions about FARO workflows? Check out our other guides on point cloud to floor plan conversion, handheld LiDAR scanning, and as-built documentation workflows.
Ready to Convert Your Point Cloud?
Try ScanToBIM-CAD free: see your scan in 3D within minutes and your first AI floor plan preview the same day. No credit card required.
Start Free TrialRelated Posts
![How to Convert Point Cloud to Floor Plan [2026 Guide]](/_next/image?url=%2Fblog%2Fpoint-cloud-to-floor-plan%2Ffeatured-automated.jpg&w=3840&q=75)
How to Convert Point Cloud to Floor Plan [2026 Guide]
Point cloud to floor plan, step by step: trace it by hand in AutoCAD or Revit, or let AI model the whole building and download Revit, IFC and DXF files. Time and cost compared.

How to Create Floor Plans from Handheld LiDAR Scans
Handheld LiDAR floor plans, step by step: handheld vs tripod scanners, popular devices (SatLab, GeoSLAM, BLK2GO, NavVis), and the workflow from scan to a native Revit model, an IFC model and DXF floor plans of the whole building. Includes best practices and troubleshooting tips.

As-Built Floor Plans from Laser Scans: A Step-by-Step Guide
As-built floor plans from laser scans, step by step: draft them by hand in AutoCAD or Revit, or let AI model the whole building and download Revit, IFC and DXF files. Time and cost compared.